This post may contain affiliate links. Please read my disclosure policy.


About This Recipe
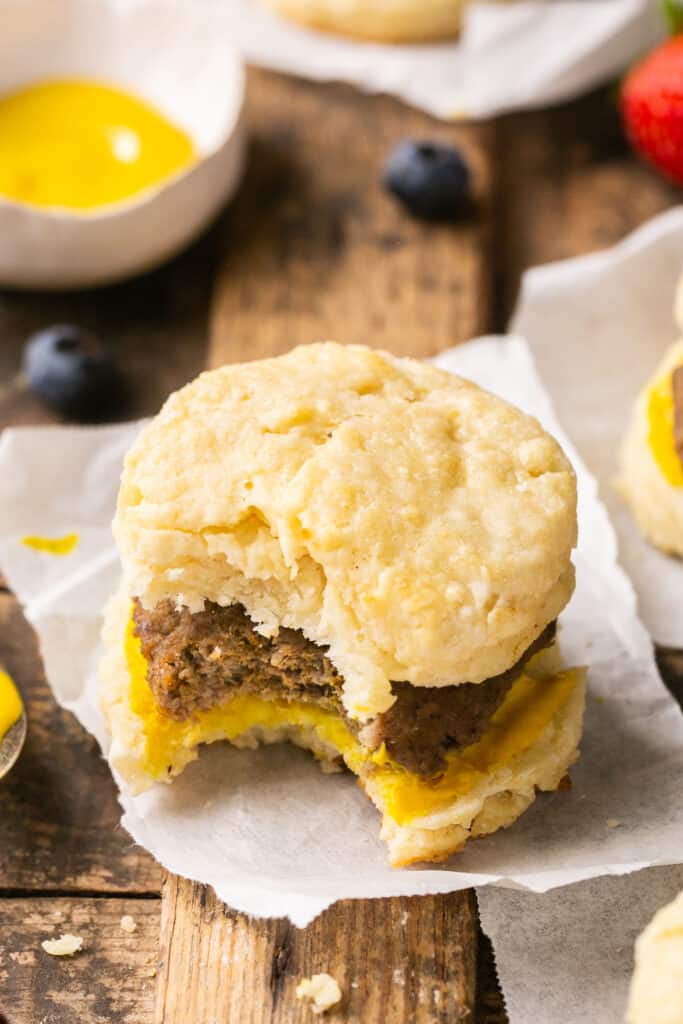
I am so excited to share this one with you, friends! BISCUITS! Yummy buttery biscuits with those mouth watering flaky layers!! These biscuits are top of the list when it comes to comfort food, am I right?
And did I mention they are lower in fat than traditional biscuits? With a little extra protein from the greek yogurt to boot!
These healthy greek yogurt biscuits are perfect for sausage biscuits, biscuits and sausage gravy, or even as a side with chicken pot pie soup, harvest salad, or any main dish really! When is ever a bad time to have a biscuit?
Oh! And these biscuits are freezer friendly making them perfect to have on deck and pull out at a moment notice. Keep reading below for instructions on how to freeze!
Why You’ll Love These Greek Yogurt Biscuits
- Ready in less than 30 minutes!
- Packed with protein thanks to the Greek yogurt
- Simple ingredients. Nothing fancy here, you probably already have these ingredients at home
- Far from dry thanks to the greek yogurt that keeps these biscuits nice and tender!
- Family favorite recipe. Highly requested recipe from my husband and family, definitely one everyone loves and enjoys!
- Freezer friendly. They freeze wonderfully (and defrost quickly!)

- Flour – I used all purpose flour. All purpose flour works best for this recipe if you’re wanting to achieve the most legit tasting biscuit. I wouldn’t recommend oat flour, almond flour or coconut flour for this one. If you want a little more health in the flour, try white whole wheat flour or whole wheat pastry flour.
- Sugar – sugar or sugar substitute. Just a little is needed which helps balance out the tanginess from the Greek yogurt.
- Baking powder – Needed to get this biscuits to rise! Make sure your baking powder is fresh.
- Salt – The salt helps brings out all the other flavors of these biscuits and they would be bland without it!
- Butter – I used cold unsalted butter. Use dairy free butter if needed. Real butter is definitely preferred but light butter should work as an okay sub if it’s all you have on hand.
- Yogurt – I used plain nonfat greek yogurt. If dairy-free, use a greek-style dairy free yogurt.
- Egg – To make an egg wash for perfectly golden biscuits! But you could also brush with milk (or dairy-free milk).
- To make gluten-free: Simply use a 1:1 gluten-free all purpuse flour for these biscuits. My favorites are King Arthur’s and Bob’s Red Mill.
How To Make
The full printable recipe is below, but let me walk you through the process so you know what to expect when you’re making it!
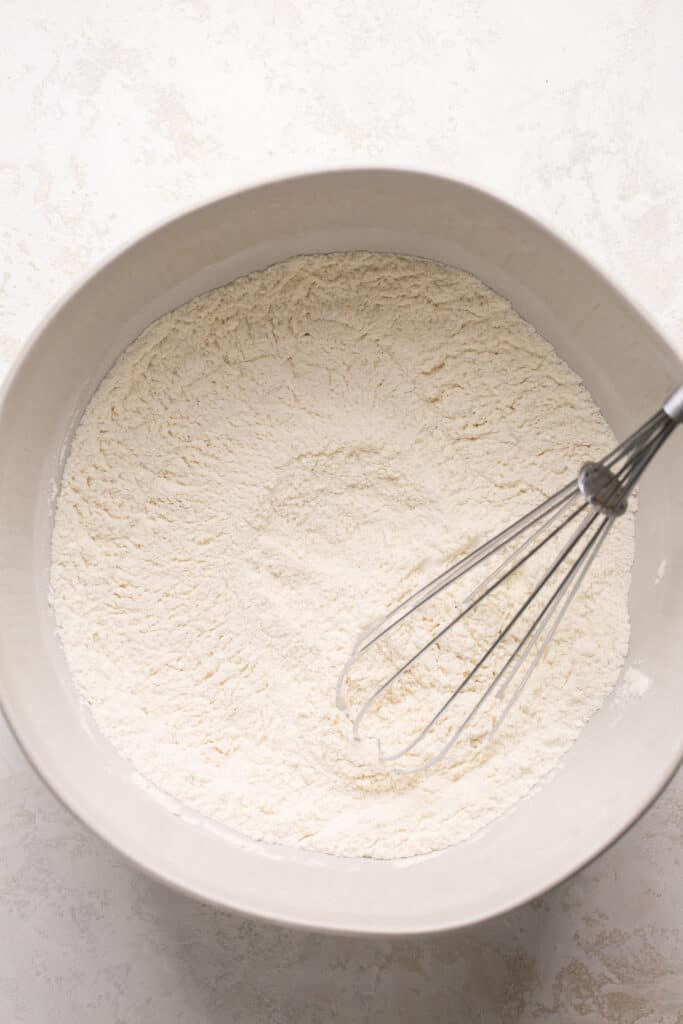
1. Preheat the oven to 375 degrees F. Line a baking sheet with parchment paper. In a large mixing bowl, whisk together the dry ingredients- the flour, sweetener, baking powder and salt.
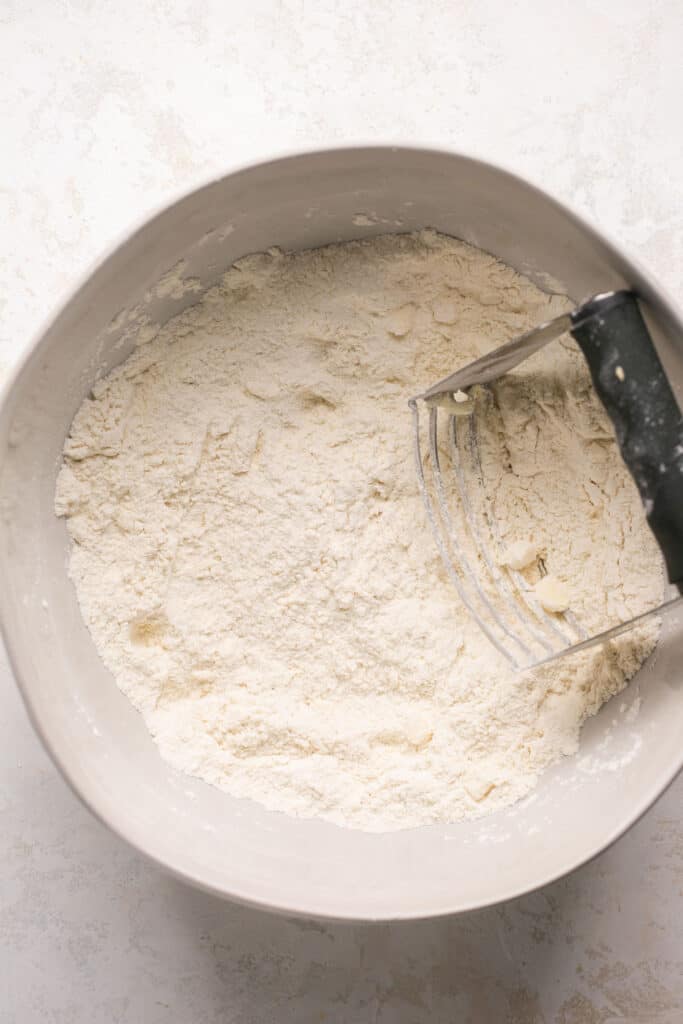
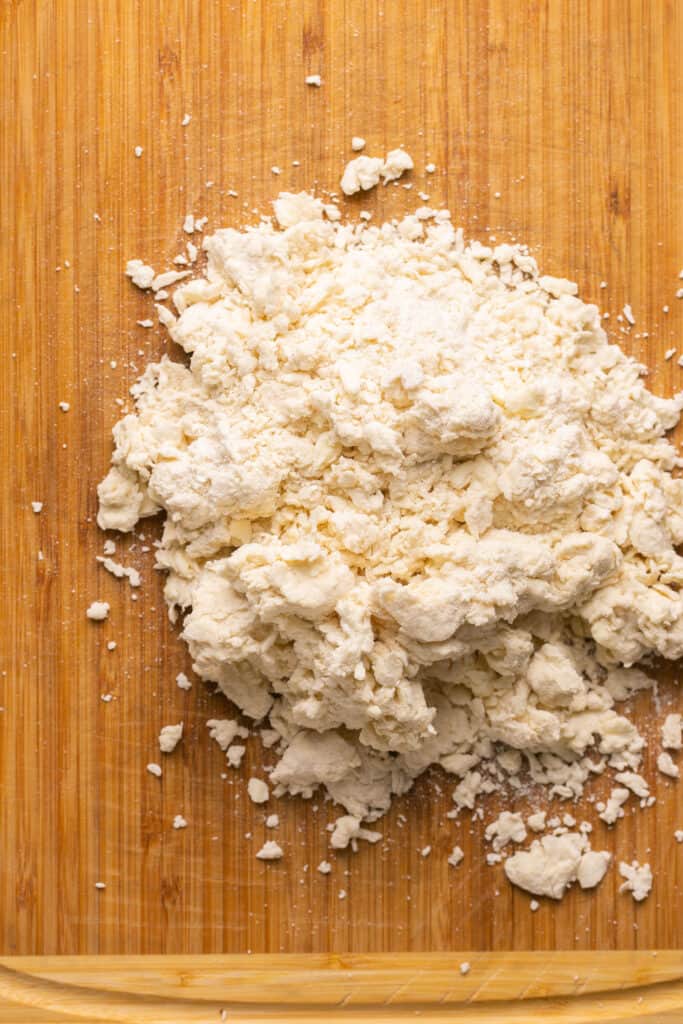
2. Cut the cold butter into small cubes then add to the flour mixture. Use a pastry cutter or two forks to cut the butter into the size of peas.
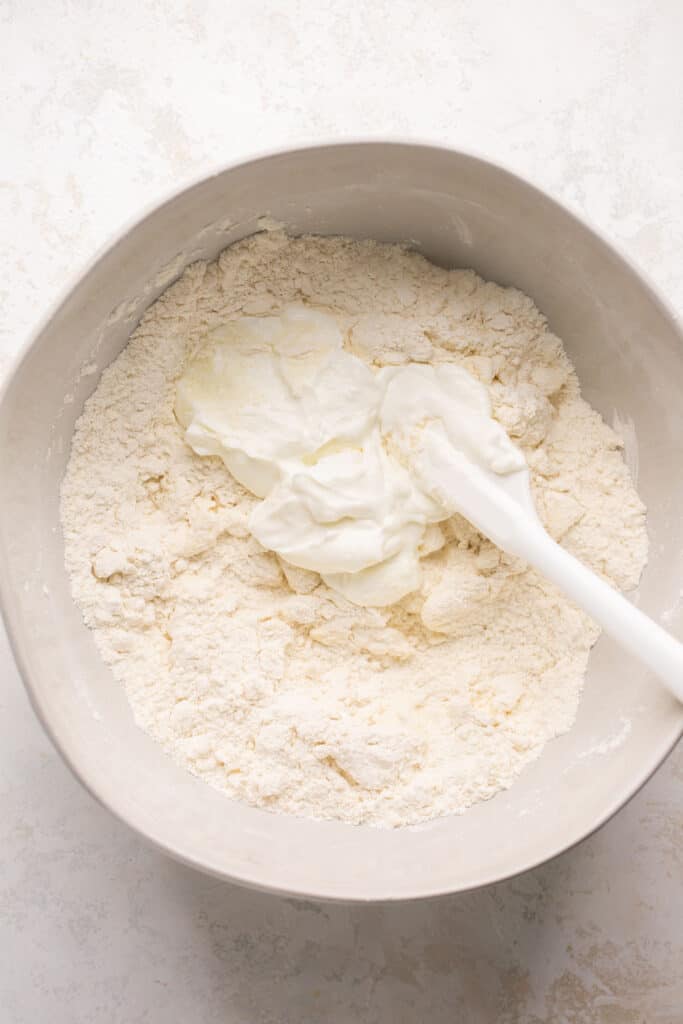
3. Then gradually mix in the yogurt with a spatula until you start of a dough forms (do not overmix or the biscuits won’t get as fluffy! There should still be flour in the bowl).
4. Transfer the biscuit dough with the remaining flour to a clean surface (or lightly floured surface) and lightly knead about 10 times (again, don’t over mix).
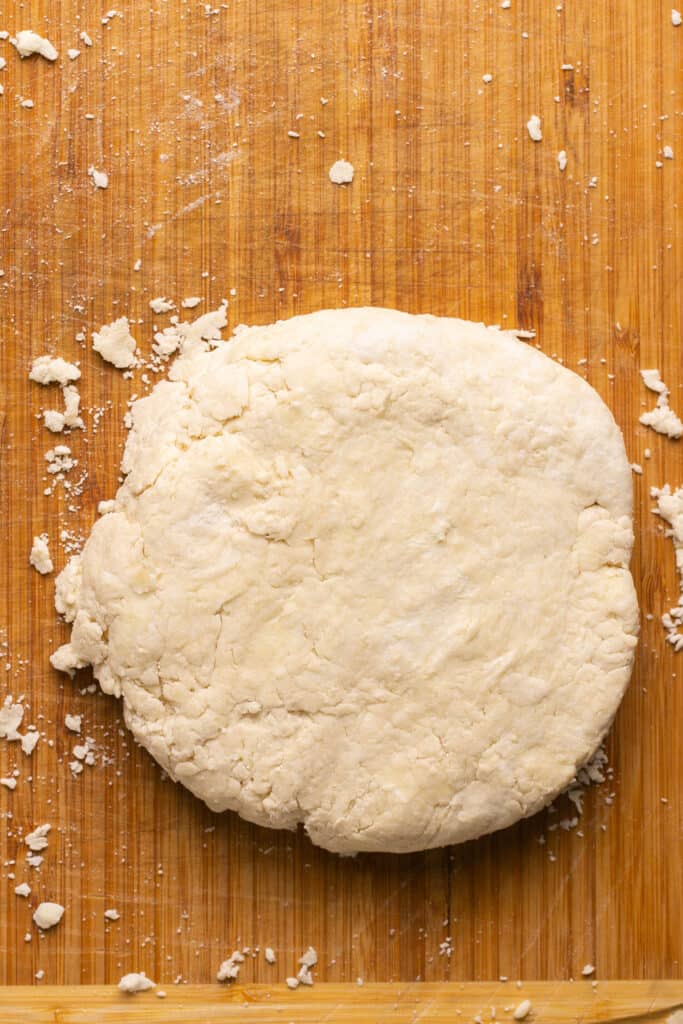
5. Shape and roll dough into an oval disc.
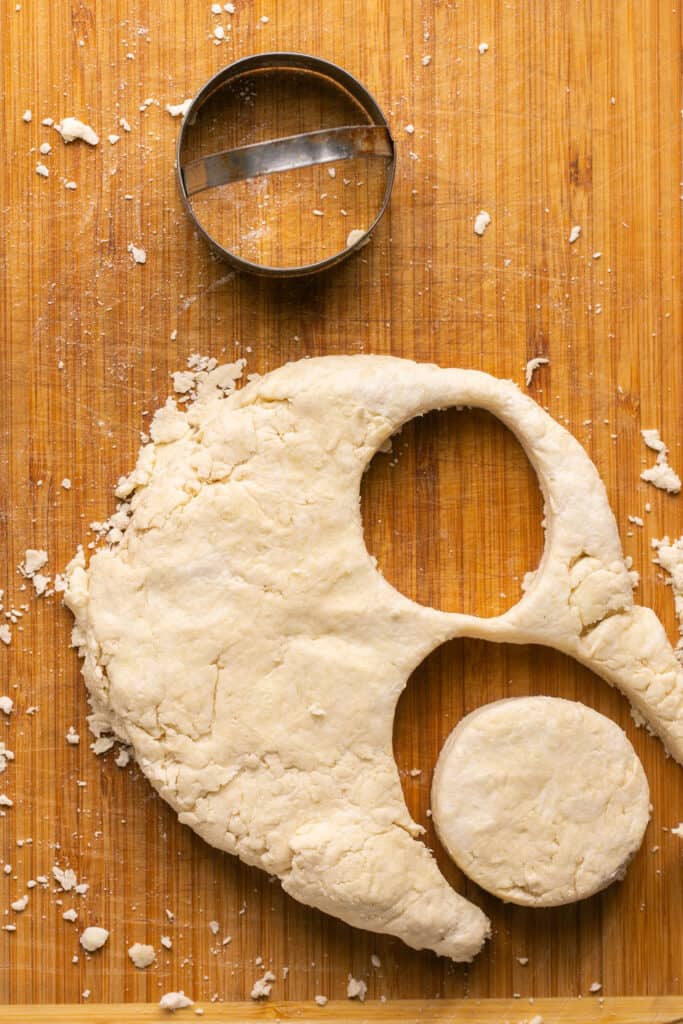
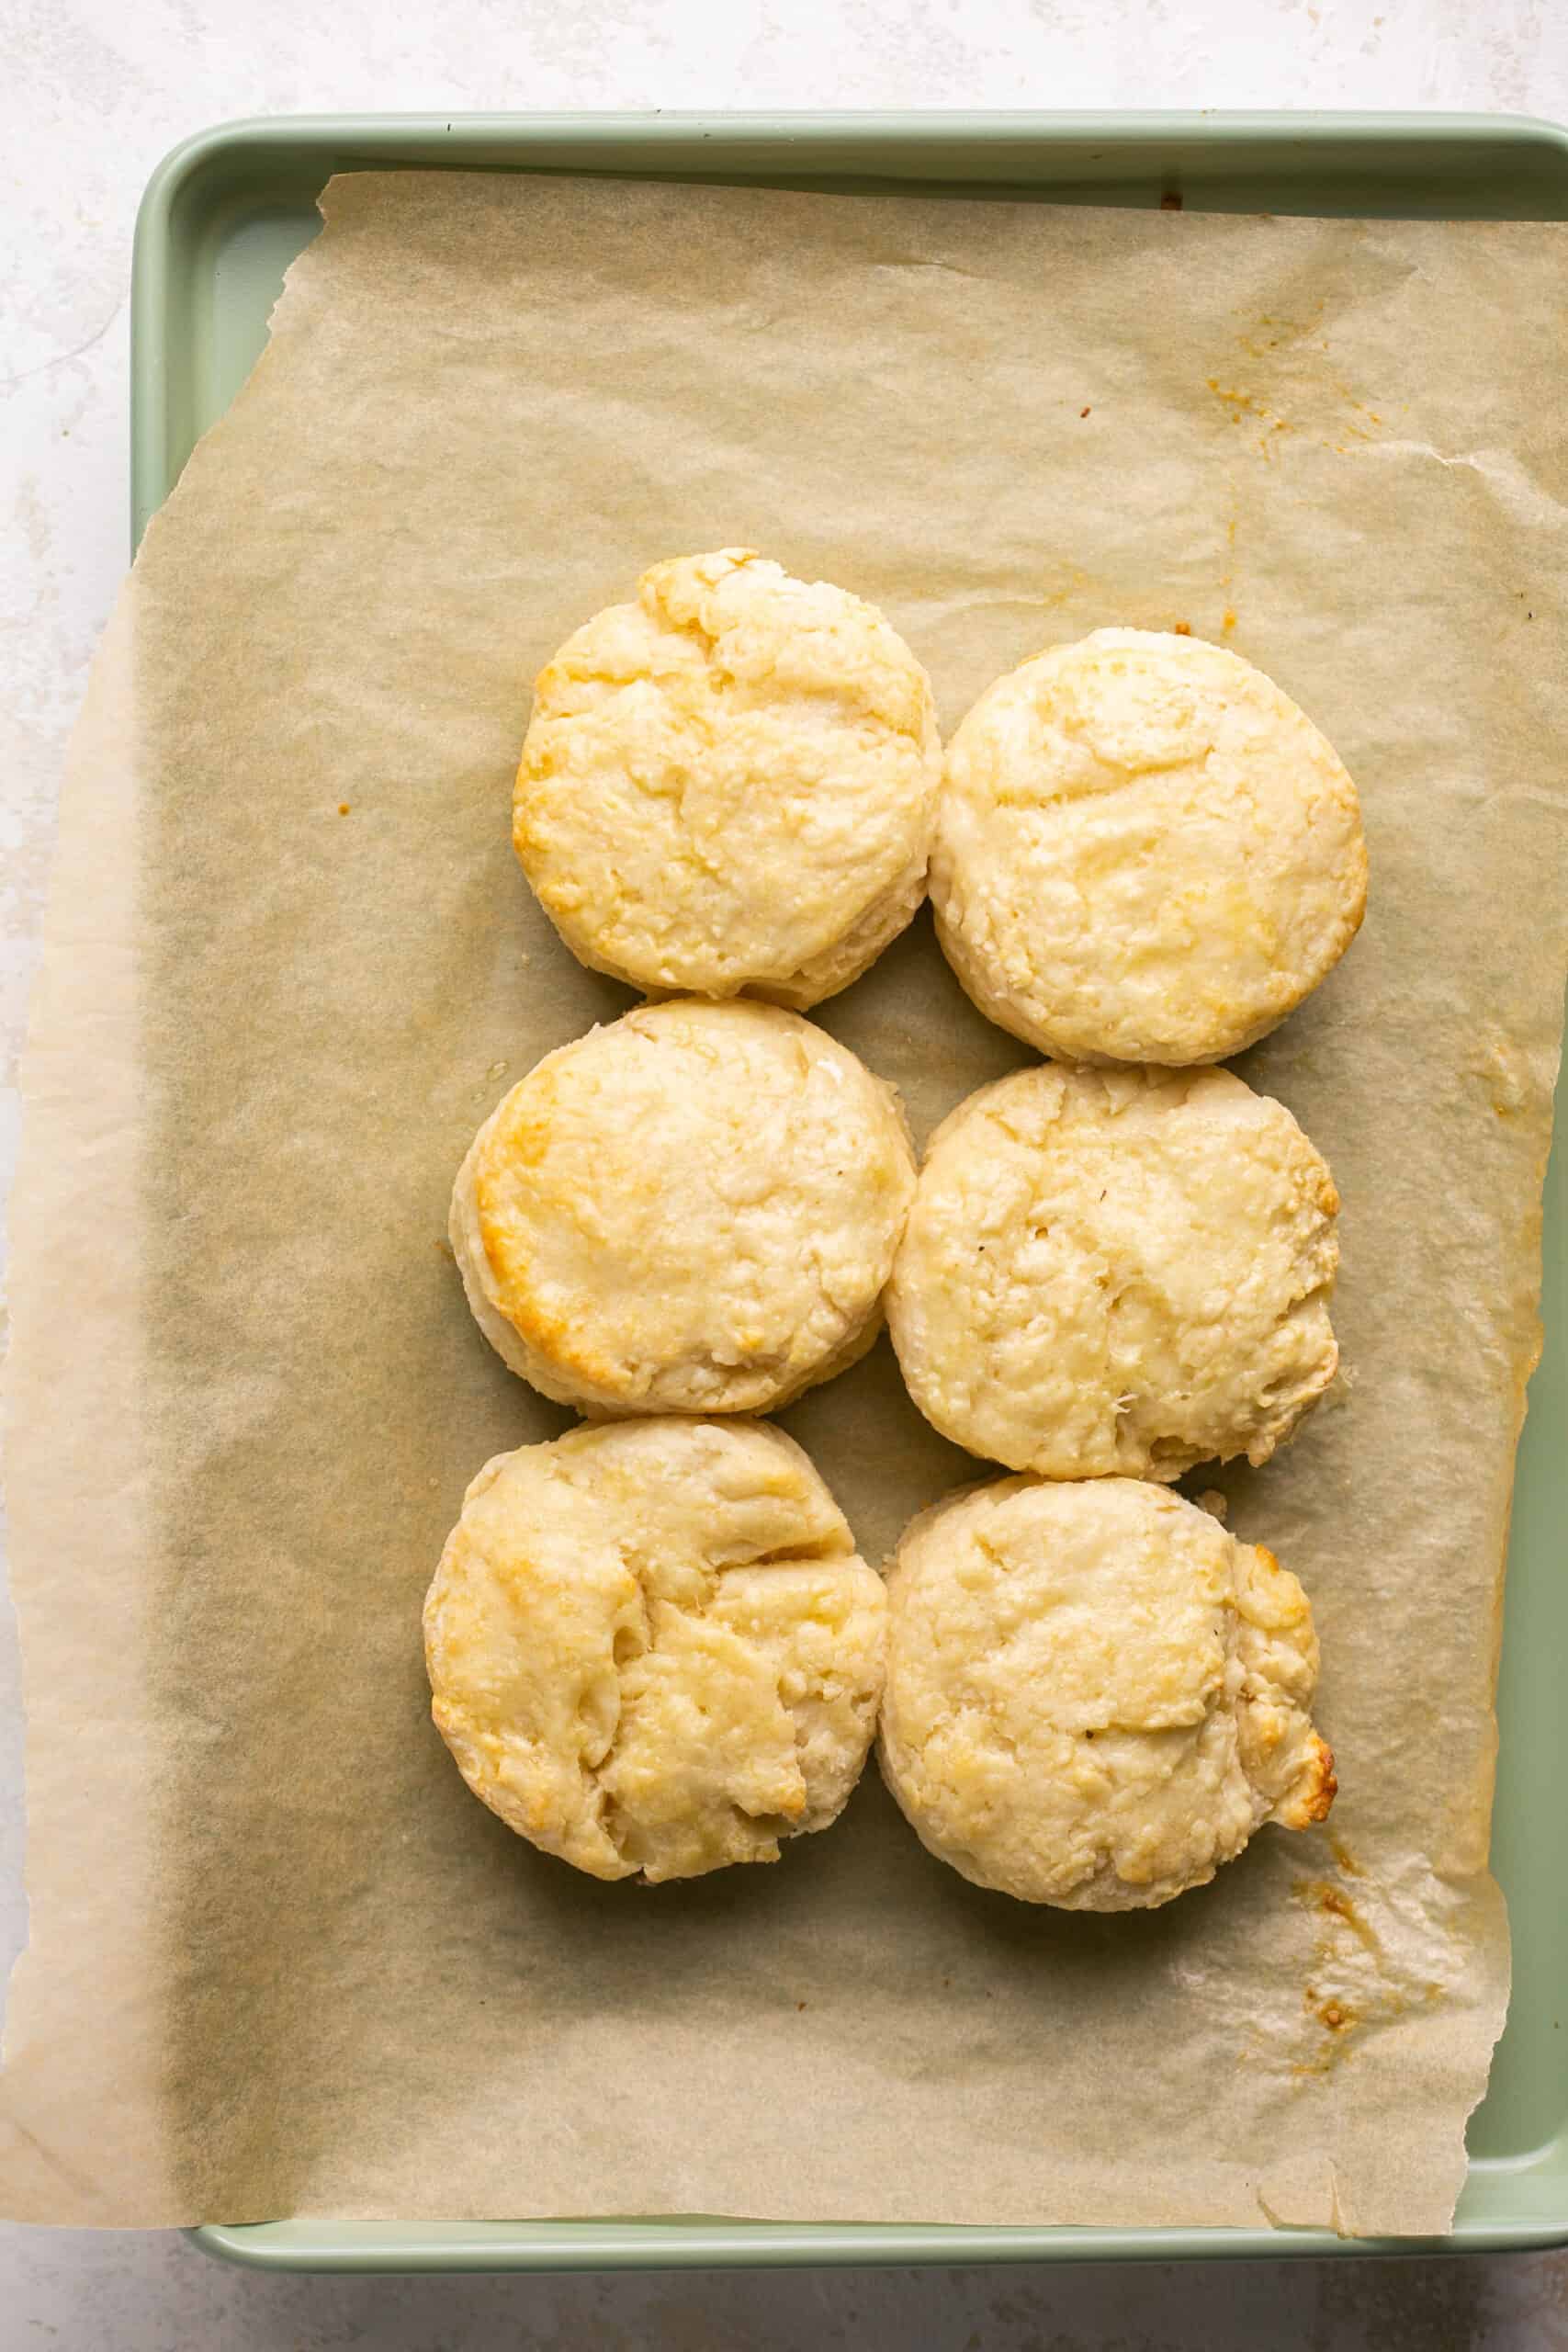
6. Use a biscuit cutter to cut out 10 small biscuits (or 6 large).
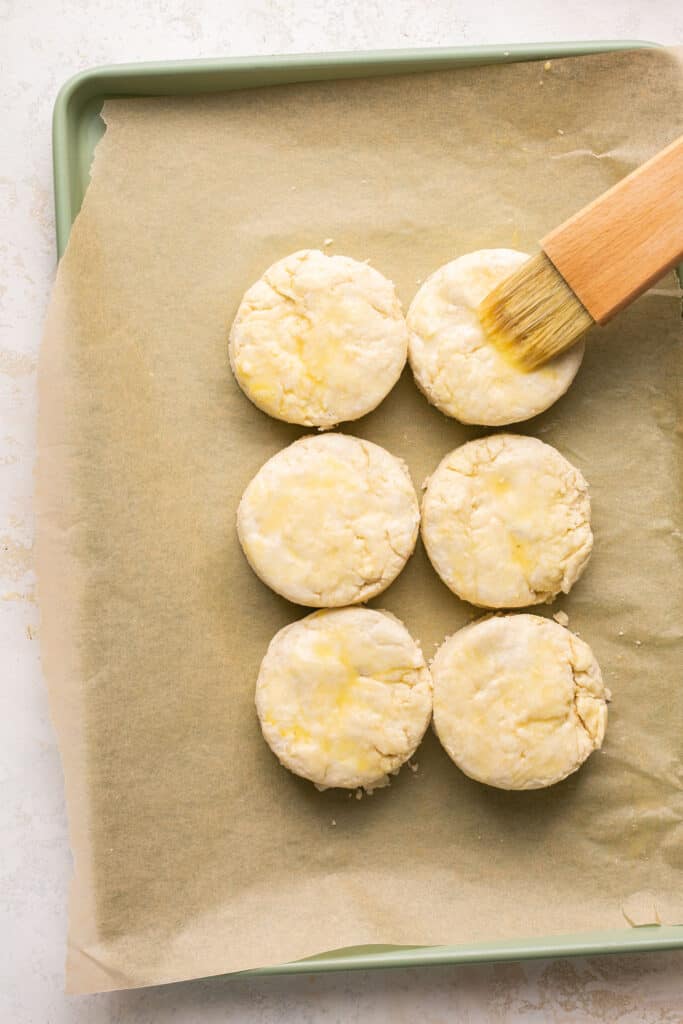
7. Place on the prepared baking sheet. Then brush the tops of the biscuits with the egg wash.
8. Bake for 10-14 minutes or until golden brown to your liking. I took mine out right at 10 minutes when they were just starting to turn golden brown. Remove from the oven and brush with more butter.
Store leftover biscuits in an airtight container or ziplock bag in the fridge for up to 7 days.
To freeze, first let the biscuits cool completely. Then, wrap individually in saran wrap and place in a freezer-safe ziploc bag. Biscuits will stay fresh in the freezer for to 2-3 months.
When you are ready to serve the biscuits, let them thaw at room temperature for about an hour. Then, warm biscuits in a 350 °F oven for 10 minutes or until warmed to liking. Brush with a little olive oil if desired to help keep them nice and tender and prevent them from drying out. Cover with aluminum foil if needed to prevent over-browning.
For The Fluffy Biscuits
- Use cold butter. We want cold butter because we want the butter to stay solid until the biscuits go in the oven. This is because when the butter melts, it releases steam and creates pockets of air, resulting in airy, flakey biscuits! If the butter is room temperature, it will combine with the flour when you knead it. Meaning, you’ll miss out on a huge piece of the fluffiness factor!
- Use fresh baking powder. This is the main culprit for many! If you haven’t used your baking powder in a while, you may want to check it’s still good before using it. To do this, mix a small spoonful of baking powder with ¼ cup hot water. It should bubble vigorously. If it doesn’t, it’s time to replace it.
- Be careful not to add too much flour (which can cause dense biscuits). I love using a digital scale for because then you know you’re measuring the exact amount. But If you’re using a measuring cup, just make sure to fluff your flour up with a fork first. Then use a spoon to scoop the flour into the cup so you’re not pressing any down. Once you have a heaping cup, level it off with a knife. We want to avoid packing the flour into the cup which will likely result in more flour than we really need.
- Don’t over-mix the biscuit batter. The more you mix, the more gluten is released, which makes the biscuits more tough and less fluffy. As Land O Lakes put it, “A smooth, homogenous dough is not the goal.” We aren’t looking for a perfectly mixed dough, we actually want it to still be floury and kneaded as little as possible.
- Don’t twist biscuits when cutting with a biscuit cutter. This can “seal the edges,” preventing the biscuits to rise – usually the main culprit of lopsided biscuits. If you don’t have a biscuit cutter, you can use a sharp knife and cut your biscuits into squares instead.
- Place the biscuits close to each other on the baking sheet. This keeps the biscuits light and fluffy along the sides, unless you like crusty biscuit edges of course, then make sure they’re separated!

Serve along eggs and sausage or bacon for a traditional breakfast or build a breakfast sandwich with them, like sausage biscuits. You can also serve them as a side along sausage gravy, soup, chili, salad or your main entree.
Yep! Just use 1:1 gluten-free all-purpose flour.
Yes, you will just need to sub dairy-free butter for the regular butter and non-dairy greek-style yogurt for the regular Greek yogurt.
Yes, these biscuits freeze great! To freeze, make sure biscuits cool completely first. Then, wrap each biscuits individually in saran wrap and place in a freezer-safe ziploc bag. Biscuits will stay good in the freezer for 2-3 months.
If frozen, remove the biscuits from the freezer and allow them to thaw at room temperature for about an hour. Then, warm biscuits in a 350°F oven for about 10 minutes, or until warmed to liking. Brush with a little olive oil if desired to help keep them nice and tender and prevent them from drying out. Cover with aluminum foil if needed to prevent over-browning.
If you have the biscuits stored in the fridge, do the same as above! Maybe just 1-2 minutes less, but this will of course depend on your oven and how cold your biscuits are before you put them in the oven.
Did you make this? If you snap a photo, please be sure leave a review, tag me on Instagram or TikTok at @LaurenFitFoodie or hashtag #LaurenFitFoodie so I can see your creations!
Easy Greek Yogurt Biscuits
Ingredients
- 2 cups all-purpose flour (240g)
- 2 Tbsp sugar (or substitute) (24g)
- 2 tsp baking powder
- 1/2 tsp salt
- 2 Tbsp unsalted butter (30g) cold, keep in fridge until ready to use
- 1 cup plain Greek yogurt (227g)
- 1 large egg for egg wash
Before You Begin! If you make this, please leave a review and rating letting us know how you liked this recipe! This helps our business thrive & continue providing free recipes. Scroll for macros and MyFitnessPal code.
Instructions
- Preheat the oven to 375 degrees F. Line a baking sheet with parchment paper.
- In a large mixing bowl, whisk together the flour, sugar, baking powder and salt.
- Cut the cold butter into small cubes then add to the flour mixture. Use a pastry cutter or two forks to cut the butter into small pea-sized pieces.
- Fold in the yogurt with a spatula until you start to form dough. Don't over-mix, dough should be shabby.
- Transfer dough and remaining flour to a clean surface and lightly knead. Shape the dough into an oval disc and use a biscuit cutter to cut out 10 small biscuits or 6 large. Place on the baking sheet. Then brush the tops of the biscuits with the egg wash.
- Bake for 10-14 minutes or until golden brown to your liking. I took mine out right at 10 minutes when they were just starting to turn golden brown. Remove from the oven. Brush with butter if desired.
Equipment
Notes
- Use cold butter. We want cold butter because we want the butter to stay solid until the biscuits go in the oven. This is because when the butter melts, it releases steam and creates pockets of air, resulting in airy, flakey biscuits! If the butter is room temperature, it will combine with the flour when you knead it. Meaning, you’ll miss out on a huge piece of the fluffiness factor!
- Use fresh baking powder. This is the main culprit for many! If you haven’t used your baking powder in a while, you may want to check it’s still good before using it. To do this, mix a small spoonful of baking powder with ¼ cup hot water. It should bubble vigorously. If it doesn’t, it’s time to replace it.
- Be careful not to add too much flour (which can cause dense biscuits). I love using a digital scale for because then you know you’re measuring the exact amount. But If you’re using a measuring cup, just make sure to fluff your flour up with a fork first. Then use a spoon to scoop the flour into the cup so you’re not pressing any down. Once you have a heaping cup, level it off with a knife. We want to avoid packing the flour into the cup which will likely result in more flour than we really need.
- Don’t over-mix the biscuit batter. The more you mix, the more gluten is released, which makes the biscuits more tough and less fluffy. As Land O Lakes put it, “A smooth, homogenous dough is not the goal.” We aren’t looking for a perfectly mixed dough, we actually want it to still be floury and kneaded as little as possible.
- Don’t twist biscuits when cutting. This can “seal the edges,” preventing the biscuits to rise (usually the main culprit of lopsided biscuits). If you don’t have a biscuit cutter, you can use a sharp knife and cut your biscuits into squares instead.
- Place the biscuits close to each other on the baking sheet. This keeps the biscuits light and fluffy along the sides, unless you like crusty biscuit edges of course, then make sure they’re separated.
Nutrition Information
Nutrition is hand-calculated and accurate. No autocalulations! However, note that values can vary based on the brands you use and if you substitute ingredients.